|
|

Making Buttons
Buttons add a wonderful touch to layouts, cards and other paper craft
projects. But finding buttons in the right color or size for
your project can be difficult. Now you can create inexpensive,
custom-colored buttons to match your next project.
To make your own buttons, you will need Button tiles
or other Technique Tile shapes,
ink pads in colors that
match your photos or project theme, and a hole punch (the Crop-A-Dile works well).
You may also want to have glitter glue or
dimensional
adhesive on hand to add some sparkle or dimension to your buttons.
-
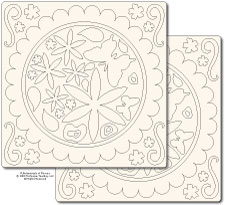
Start with or choose a
Technique Tile shape that complements your photos or your project theme.
To add all-over color, rub an ink pad
across the surface of the Technique Tile. If you want a deep
and saturated color use a dabbing motion.
For a softer look,
use more of a swiping motion.
It works best to add layers of
color. You can always add more ink to get a deeper color but you
can't remove the color once it is on the tile. Allow time for
the ink to dry.
Tip: Chalk inks provide a soft and velvety, yet opaque
coverage on the tiles. These inks also offer a great
foundation of color to stamp additional designs, words,
or patterns.
-
If you would like to add a pattern
to your button, use a letter stamp, word stamps, or image
stamps and a complementary color of ink to stamp a design on
top of the base color you just applied. Use firm
even pressure when stamping on the tile. Allow time for the
ink to dry on the tile.
-
Use a Crop-a-Dile or other sturdy hole punch to make
small holes in the center of the tile.
- If you want to add some sparkle to your buttons,
apply a thin coat of Stickles Glitter Glue to the tile. You can add all-over color
or just add spot color to the stamped images. The Stickles
will dry flat regardless of the amount you apply, so use it
sparingly and it will dry much faster. Let the Stickles
dry completely before going on to the next step.
-
If you want your buttons to have a glossy
appearance, apply an even layer of dimensional
adhesive to the face of the tile. Make sure you don't fill
in the holes.
Tip: Glossy
Accents has a lower water
content than other dimensional adhesives which makes it
easier to ensure that the holes do not fill in and that
your project won't warp. If you use a different dimensional adhesive, it
works best to apply thin layers and let each layer dry before
moving on to the next layer.
Allow plenty of time for the Glossy Accents or dimensional
adhesive to dry. It may take several hours depending on
the humidity and how much adhesive
you applied to your project.
- Use thread, craft string, or thin ribbon to tie through
the holes. Then use double-sided tape to adhere your beautiful
new buttons to your project.
Featuring the following products:
|